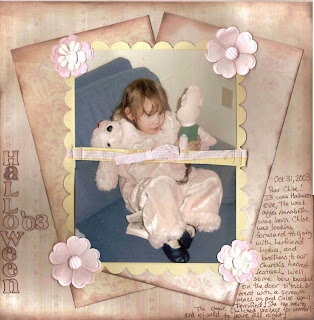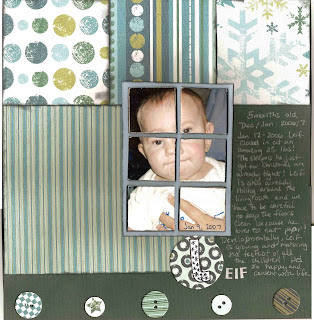
Necessity is the mother of invention, and while i don't claim to have invented this technique, i've not seen it posted anywhere and thought i'd share! I was in a position where, i needed halloween pictures, and miraculously, i uncovered some pictures from a halloween 4 years ago that i hadn't scrapped... only problem, there was 4 of them... and only one with my daughter.... my big printer prints really lightly... not ideal for photographs, and i didn't want to just use one 4x6 picture for this one... so i came up with an idea... i went into photosmart, the software i use to edit pictures and did the following.
1. took the picture of chloe, and cut it in half, horizontally, since i wanted a horizontal picture. I was careful not to make the cut anywhere obvious, like her face or something. that left just the top half of the picture. I renamed that picture TOP (oh, so original :-) IMPORTANT: do nOT save over the original picture! make sure you rename it!!
2. then i took the original picture and cropped it at the same point as the other one, except cropping OFF the top part. i named this one "bottom"
3. then i set my printer to borderless print, so that i'd end up with 2 4x6 pictures. and printed out the top and bottom half.
4. Now, normally, i don't think it would be necessary but after peicing together the pictures, making sure they lined up right, i wrapped a ribbon around the picture on the juncture. I did that because my printer was starting to run out of ink, and the top picture was slightly lighter than the bottom. you CAN do this or you can choose not to, depending on the look you are shooting for. You couuld also cut in fourths and make a rEALLY big picture. This would also be idea for if you had PLANNED to cut the pictures into segments, like to make a layout like this one

8 comments:
What a cool way to print some larger photos!! i love the mosaic look of the baby too. :)
What a great idea! Thanks!
What a great idea! Thanks for sharing!
So that is why the ribbon is in the middle of the picture!!! LOL Great idea. Way to step outside of that box and share with all of us!!! Thanks Rebecca for your wonderful tutorial.
Cool idea! Thanks!
Such a cool, cool idea!!!
such a cool idea...thanks for sharing it with us...
i loved that tut over at serendipity! such a great idea!!!! i never would have known that is why the ribbon is in the middle of the pic! looks decorative!
Post a Comment