Monday, November 12, 2007

Good morning!

I embarked on my new adventure this morning! I got up at 6 and dragged my best friend out of bed and made her walk around the apartment complex with me in the pouring rain! wahooo! then i went home, nursed the baby and had some time to pray and read the bible and write in my journal, and read the devotional for the day... WOW, what an invigorating experience.. its NOT hard to have God time when you've been walking in rain for 20 minutes!!! anyway, i thought i'd post a super neat resource i found

http://triplethescraps.blogspot.com/

She's got posted a scripture challenge for the new year. If you go to

http://faith-sisters.blogspot.com/

you will find another great blog, and their store offers lots of great digi downloads, many of them fREE including lots of neat scripture word art.

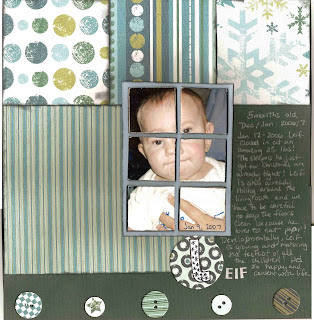
So any other Sisters in Christ here?? do you do any faithbooking?? here's one i made this week...

Thursday, November 8, 2007

layouts created with my scrappersxchange kit!

Ok, so i JUST started subbing to this kit and it ROCKS!! here's what i've made so far, and i have so much left... lest ye think i'm senile, i make albums for each of my children, which is why they all look the same, LOL


My favorites from last weekend's crop!

What do you think? i had a great time making these.. i also made a bunch with my scrappers xchange kit but i made a seperate post...


my November creations from CHS

hey all! i forgot to post my CHS creations!! check out the link, its a BEAUTY! here's my layouts...


Its kind of hard to see the detail here, but this is glitter glue in an off white color that i randomly sprinkled brown MM glitter into and then shook off. The result is a really neat swirly color.
I think this one above is my favorite... i also used it for a challenge at Scrapping the music blog
which is a MUST VISIT by the way, GREAT blog!


These are ATC cards that i'm hoping to put inside a narrow long frame as fall decor

This is a patterned paper backed fancy pants transparency... so much fun and so beautiful.

Tuesday, November 6, 2007

A plug for a GREAT store

Ok. This is NOT just because there's a shameless plug contest going on now.. i have loved serendipity from the moment i found it. She ships FAST. She's located in WA, so i know i'll get my stuff the day after she ships it, so if i need something fast, that's where I go. BUT don't stop with just ordering from Kristen, check out the boards, they are my favorite, small, intimate and those there are sincerely caring of others... they are like family. Come check it out!!
www.serendipityscrapbooks.com

OY VEY! DT Reveal!

Ok, so i'm DELAYED! ugg... crazy life...

Ok, so i had 2!!! reveals this month. i was honored to win a contest at scrapdango
and my prize was to be the guest DT for November. and i was very privileged to get to play with their fantastic kit. here's what i made...


Wednesday, October 24, 2007

making 2 small pics into 1 big pic tutorial

Here is the finished project. It is one picture sized 8x6. This is a great way to make a large picture from 2 or 4 4x6 pictures. Its ideal if you have only a small photo printer, or even just because small photo papers are SO much cheaper than large ones! Enjoy!
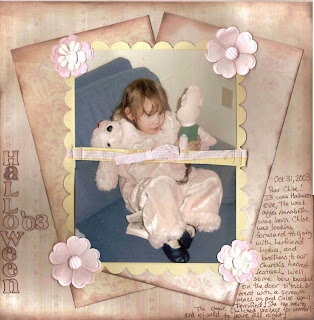


Necessity is the mother of invention, and while i don't claim to have invented this technique, i've not seen it posted anywhere and thought i'd share! I was in a position where, i needed halloween pictures, and miraculously, i uncovered some pictures from a halloween 4 years ago that i hadn't scrapped... only problem, there was 4 of them... and only one with my daughter.... my big printer prints really lightly... not ideal for photographs, and i didn't want to just use one 4x6 picture for this one... so i came up with an idea... i went into photosmart, the software i use to edit pictures and did the following.

1. took the picture of chloe, and cut it in half, horizontally, since i wanted a horizontal picture. I was careful not to make the cut anywhere obvious, like her face or something. that left just the top half of the picture. I renamed that picture TOP (oh, so original :-) IMPORTANT: do nOT save over the original picture! make sure you rename it!!

2. then i took the original picture and cropped it at the same point as the other one, except cropping OFF the top part. i named this one "bottom"

3. then i set my printer to borderless print, so that i'd end up with 2 4x6 pictures. and printed out the top and bottom half.

4. Now, normally, i don't think it would be necessary but after peicing together the pictures, making sure they lined up right, i wrapped a ribbon around the picture on the juncture. I did that because my printer was starting to run out of ink, and the top picture was slightly lighter than the bottom. you CAN do this or you can choose not to, depending on the look you are shooting for. You couuld also cut in fourths and make a rEALLY big picture. This would also be idea for if you had PLANNED to cut the pictures into segments, like to make a layout like this one